
DIY Series: Marbling Paper
MATERIALS

Printmaking paper (I love BFK Rives)
Aluminum chafing dishes (or another kind of tray)
-kit includes carrageenan and alum mordant- you can also purchase these items separately
Gallon jug
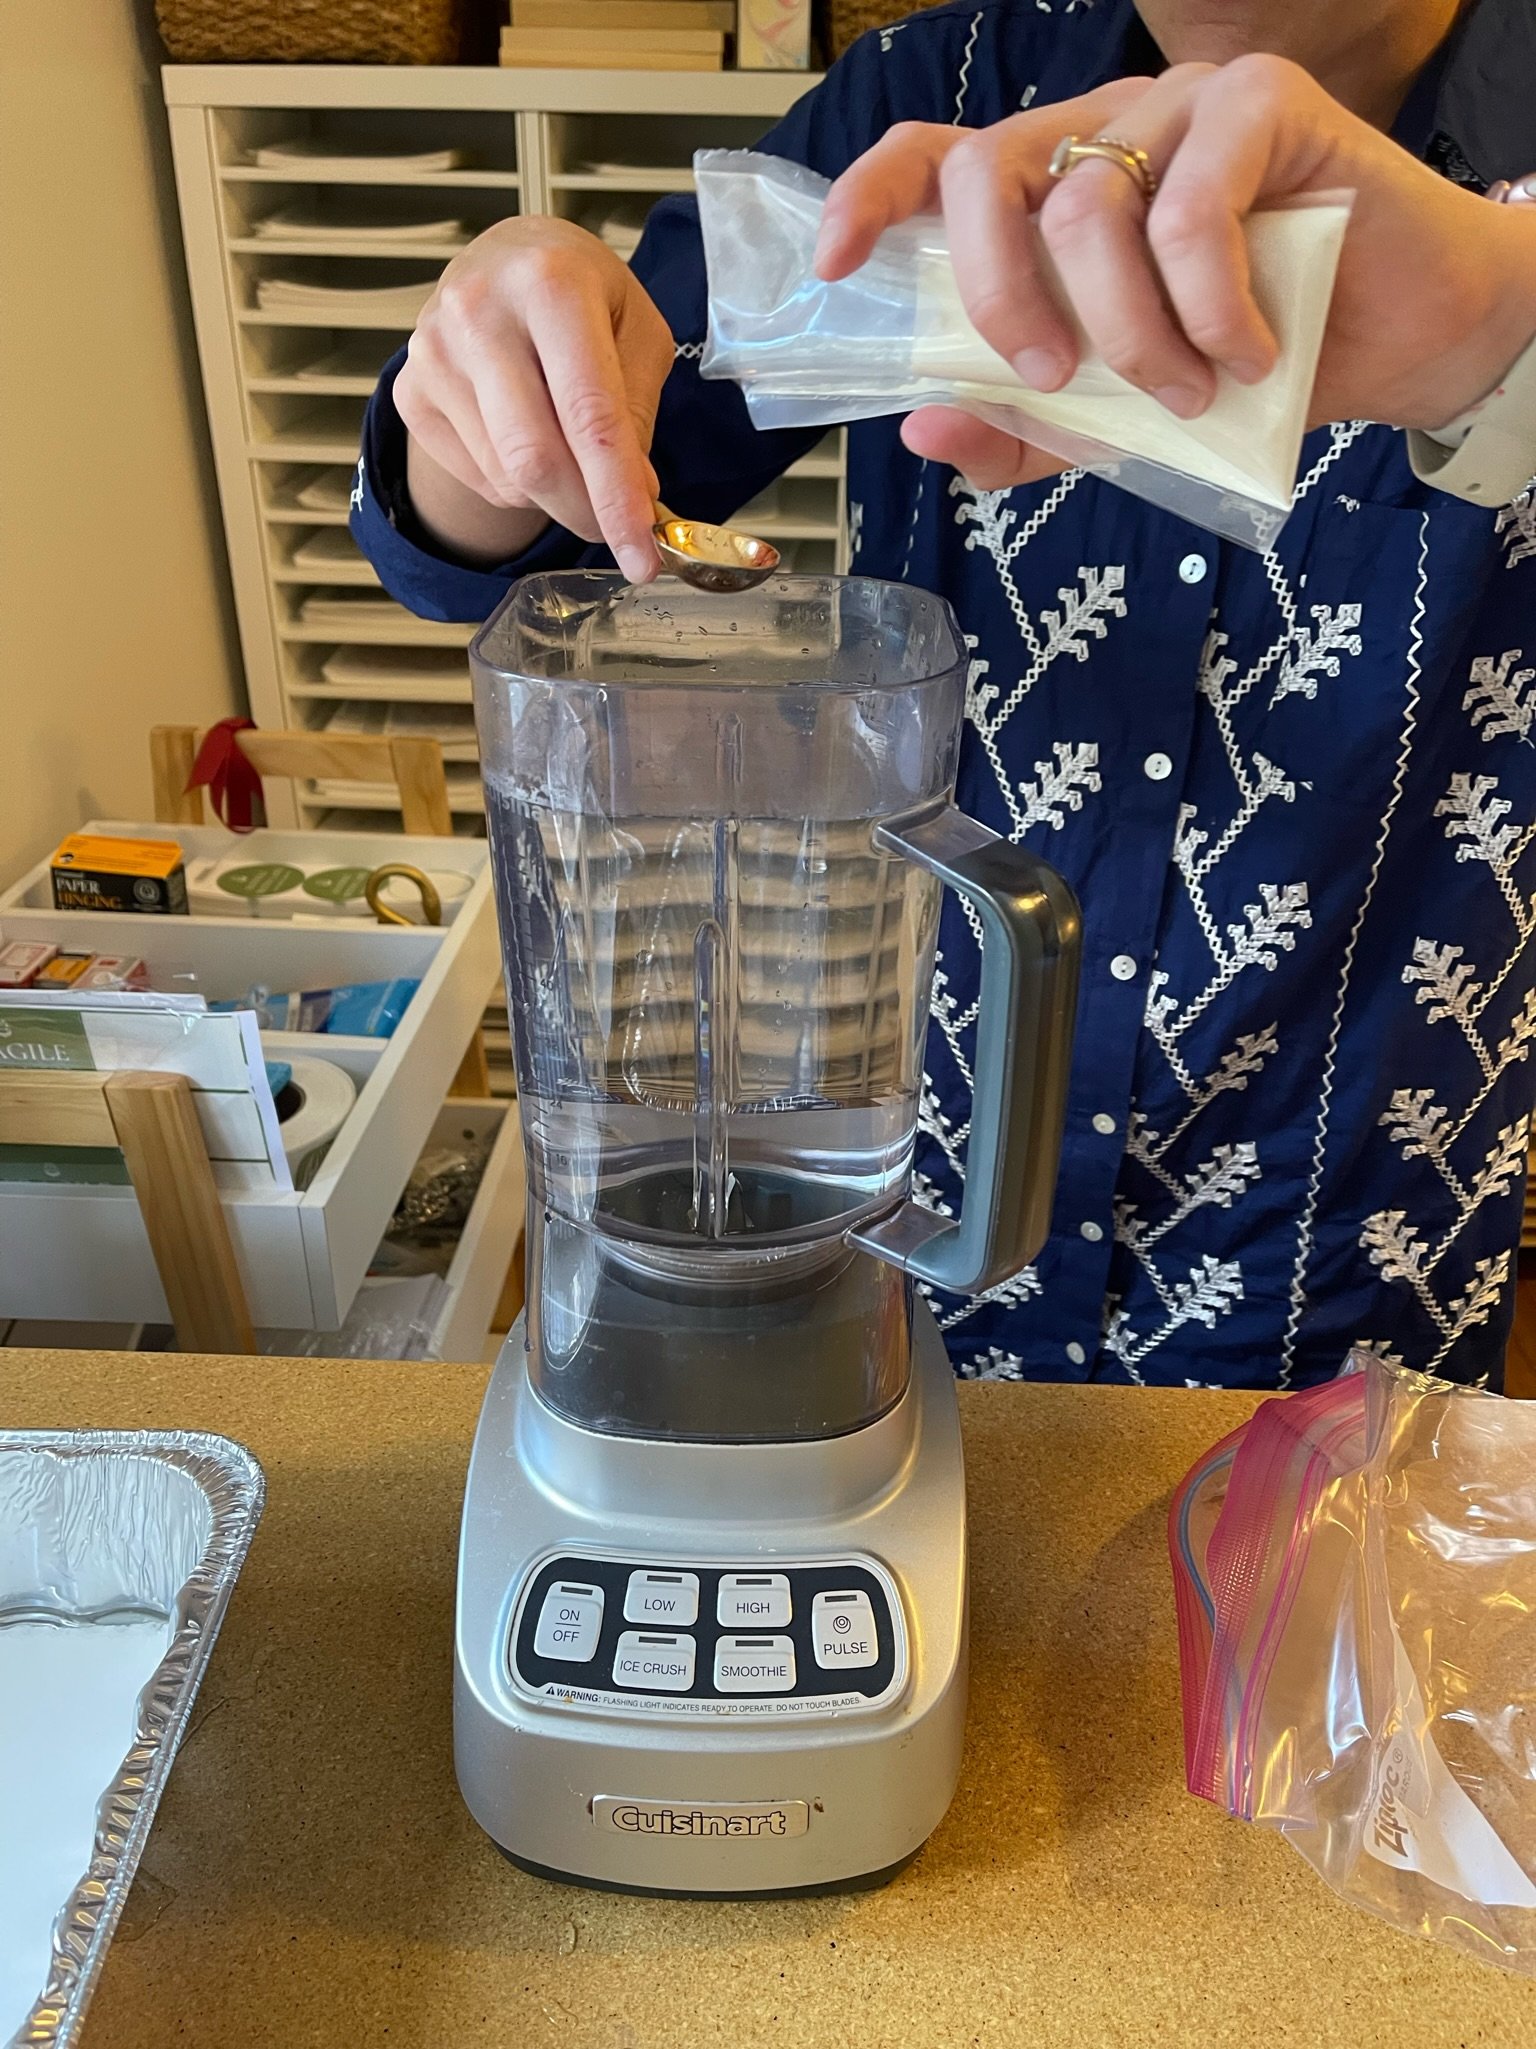
Blender
PROCESS
Prep/deckle paper- I’ve experimented with a few different types of paper, and my favorite by far was BFK Rives printmaking paper. Because it comes in large sheets, I have to separate the sheets into smaller pieces so that they fit in the marbling tray. I do this by first marking off where I want to tear the paper, and then placing a stainless steel ruler on top of the paper. While holding down on the ruler with one hand, I slowly tear the paper along the edge of the ruler. This gives the paper a really nice “deckled” edge!

2. Pretreat paper with a mordant- in order to ensure that the design sticks to the paper, the paper needs to be treated with a mixture of alum powder and water. Dissolve two teaspoons of alum in one quart of warm water, then pour the mixture into a tray (I use aluminum chafing dishes).

3. Submerge pieces of paper one by one and let sit for 20-30 minutes, then line dry.
You need to use the paper within two days of treating it with mordant!

4. Prepare the marbling bath- the “size”- the “size” is essentially thickened water you use to float the marbling inks. Add four teaspoons of carrageenan to a gallon of warm tap water and mix in a blender (I’ve tried using a whisk and shaking a gallon container, and even though it’s a little messy, it’s so much faster with a blender!)
The mixture will keep for a few days at room temperature, or about a month in the refrigerator. The instructions for the Jacquard kit say that it reaches “optimum consistency after 12 hours” but I’ve used right away and a few weeks after preparing and have had similar results!


5. Mix your inks- if you purchased the Jacquard kit, you’ll see that it comes with six colors. I loved mixing those colors together in extra dropper bottles to create new ones. The Jacquard colors are a little bright, and so to “dull” the colors/make them a bit more muted. You’ll also need to mix your own colors to create green and orange. I mix the color I want to mute with a tiny bit of its complementary color (so, to make a darker, more muted red, I mix in a tiny bit of green in). To make pastel colors, I mix a tiny bit of a color (like blue) with a lot of white. A tiny bit of the colored ink goes a long way.

6. Time for the fun part- the marbling! Pour your marbling size into your tray- I usually like to make the bath/size a few centimeters deep. A few fun patterns you can make-
Stone- this is the simplest pattern- you just drop a few drops of different colored ink across the surface of the bath, and then pull your print (see number 7!)
Zig-Zag- start with the stone pattern. Then, using a wooden dowel or the bottom of your marbling comb, starting at one end of the tray, “draw” a line from the bottom to the top of the tray, and then “zig-zag” in the opposite direction. Continue throughout the surface of the bath before pulling your print.
Nonpareil- Start with the zig-zag pattern. Then, using the comb, “comb” across the bath in the opposite direction of the parallel lines created by the zig-zag pattern. Then, pull your print!


7. To pull a print, slowly lower the paper onto the size, so that the paper is touching the surface of the size- I start by lowering the middle of the paper onto the size, and then lowering the edges. Once the entire piece of paper is touching the surface, slowly pull it away from the surface, and let the excess size drip off the paper before placing the paper on a paper towel to dry.

8. Let dry for 24 hours- I dry flat on top of a paper towel until damp (usually about 30 minutes to one hour), then move the paper to a line with clothespins.

9. Once your paper has dried for 24 hours or longer, turn on your sink faucet so that there is a thin trickle of cold water. Slowly rinse the marbling bath mixture off your paper, and gently pull your fingers across the surface until it’s no longer slippery. Finally, let excess water drip off, and place paper on top of a paper towel to dry flat.
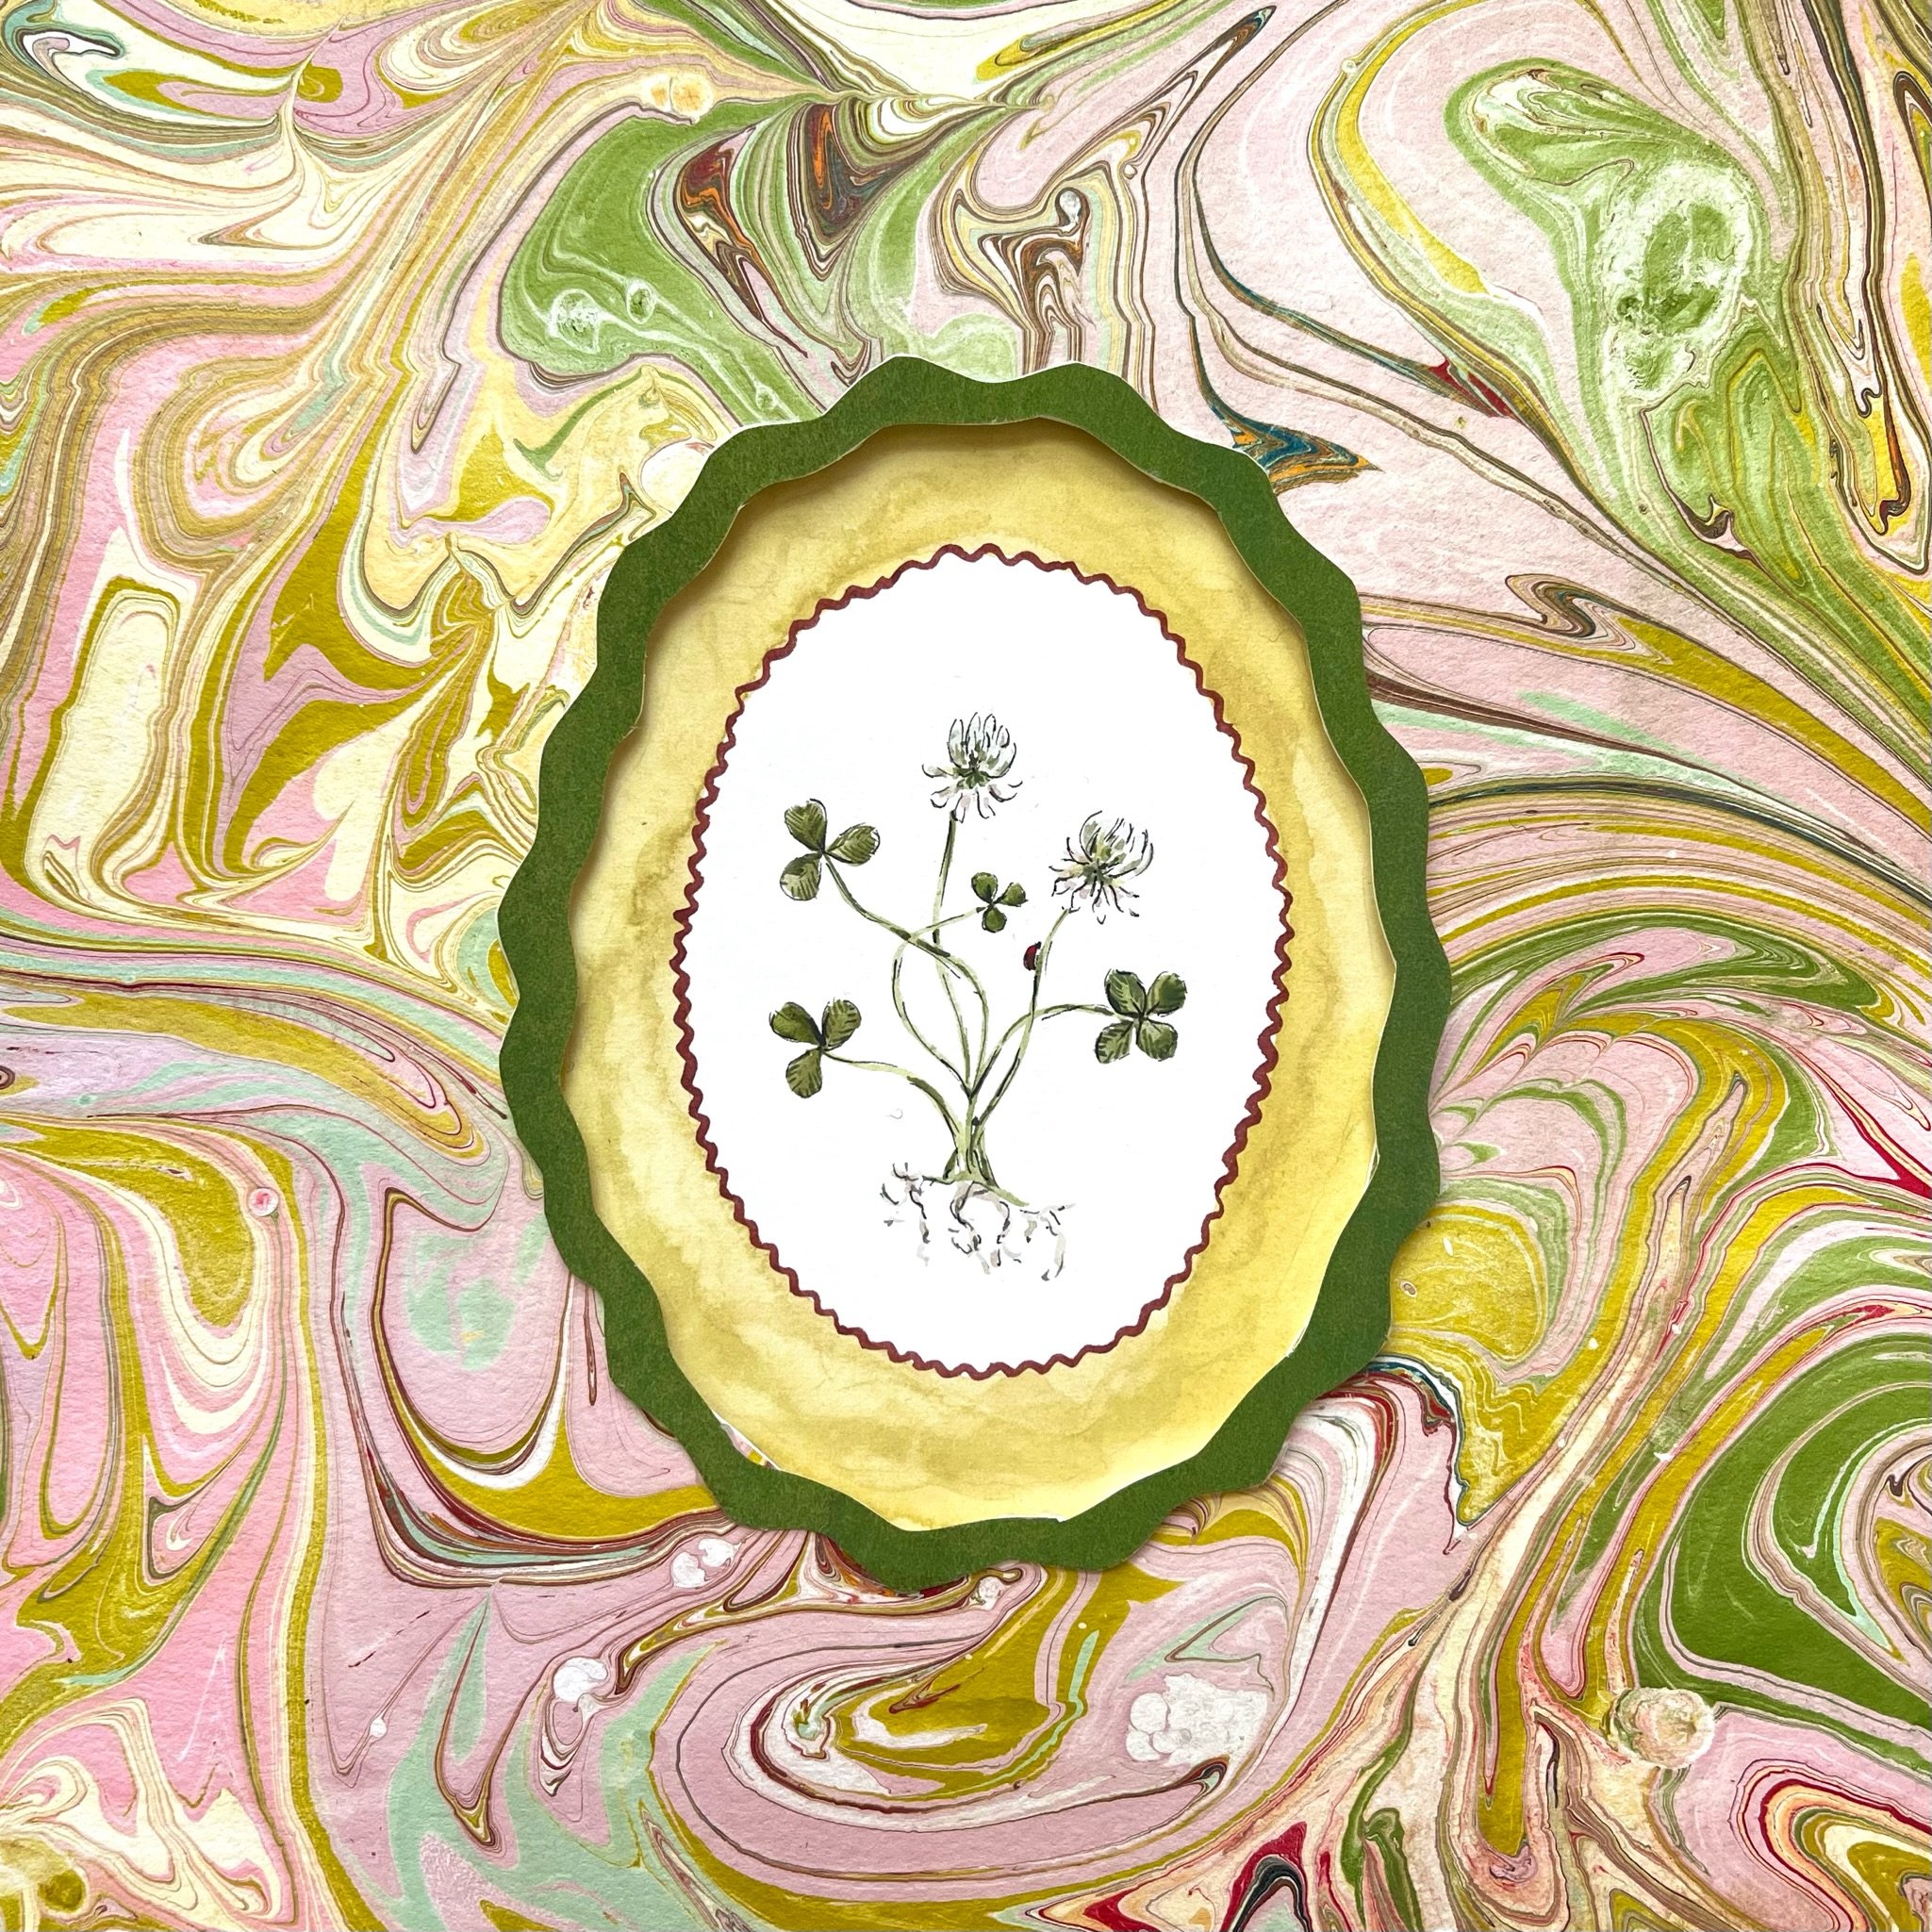
IDEAS FOR USING YOUR MARBLED PAPER
Mount your paper to a piece of mat board, and then use a mat cutter to create a mat for a favorite photo or piece of art
Greeting cards
Gift tags
Use Mod Podge to decoupage marbled paper onto wooden frames
Wrap old shoeboxes with marbled paper for storage
ACCOMMODATIONS/IDEAS FOR MARBLING WITH KIDS
Pre-treat your paper with mordant, and make the marbling bath ahead of time, OR break the activity into two days (treat paper and make the size on day one, and then marble on day two)
Older kids will love mixing colors, but it’s very messy- I spill every time. For kids 10 and under, I would probably pre-mix the colors! For older kids, I would print out a color wheel and talk to them about complementary colors/mixing primary colors to make secondary/etc. For younger ones- you can still show them the color mixing step (you could even mix them while reading Mouse Paint, one of my favorites :)